How to Color Grade Your YouTube Videos Like a Pro
Color grading is one of the most essential yet often overlooked steps in video production. It can transform the look and feel of your YouTube videos, elevating them from amateur to professional. Done correctly, color grading enhances your video’s tone, mood, and overall aesthetic, helping you better communicate your message and keep viewers engaged.
In this guide, we’ll walk you through the steps to color grade your YouTube videos like a pro, whether you’re new to video editing or looking to refine your skills.
What Is Color Grading?
Before we dive into the how-to, let’s clarify what color grading is. Color grading involves adjusting the colors in your video to achieve a specific look or mood. It’s different from color correction, which is the process of fixing issues like overexposure or incorrect white balance. While color correction makes your footage look more natural, color grading enhances it with a stylistic touch.
With the right color grading techniques, you can add drama, warmth, or vibrancy to your videos, making them more visually appealing and professional.
Step 1: Choose Your Editing Software
The first step to pro-level color grading is to choose video editing software with robust color grading features. Here are some of the best options:
• Adobe Premiere Pro: One of the industry’s top choices, Premiere Pro includes comprehensive color grading tools, including Lumetri Color.
• DaVinci Resolve: Known for its high-end color grading features, DaVinci Resolve is a popular choice among professionals, and its free version offers most of the tools you’ll need.
• Final Cut Pro: Apple’s professional video editing software provides excellent color grading options with an intuitive interface.
• Filmora: An accessible tool for beginners that includes simple color grading features.
Once you’ve selected your software, import your video footage and get ready to begin color grading.

Step 2: Apply Basic Color Correction
Before you start color grading, you need to correct the colors in your footage. This ensures that the lighting, contrast, and colors are balanced. Here’s how to do it:
2.1 Adjust White Balance
The first step in color correction is to ensure that your video has accurate white balance. This means the whites in your video should appear pure white, not tinted with colors. Most editing software has an eyedropper tool that allows you to select a white area of your video to correct the balance.
• In Premiere Pro, go to the Lumetri Color panel and use the white balance selector to adjust it automatically.
• In DaVinci Resolve, use the Color Wheels to fine-tune the temperature and tint until the whites are balanced.
2.2 Adjust Exposure and Contrast
Next, ensure your footage has the correct exposure and contrast. Exposure affects how bright or dark your video looks, while contrast controls the difference between light and dark areas.
• In most software, you can adjust exposure using the Brightness or Exposure slider.
• Adjust the contrast to create depth between highlights and shadows.
The goal is to make your footage look natural before moving into more stylized color grading.
Step 3: Create a Consistent Color Palette
Color grading is all about consistency. You want to maintain a cohesive look and feel throughout your entire video. Here’s how to establish a consistent color palette:
3.1 Choose a Mood or Theme
Before diving into the technical aspects, think about the mood or theme of your video. For example:
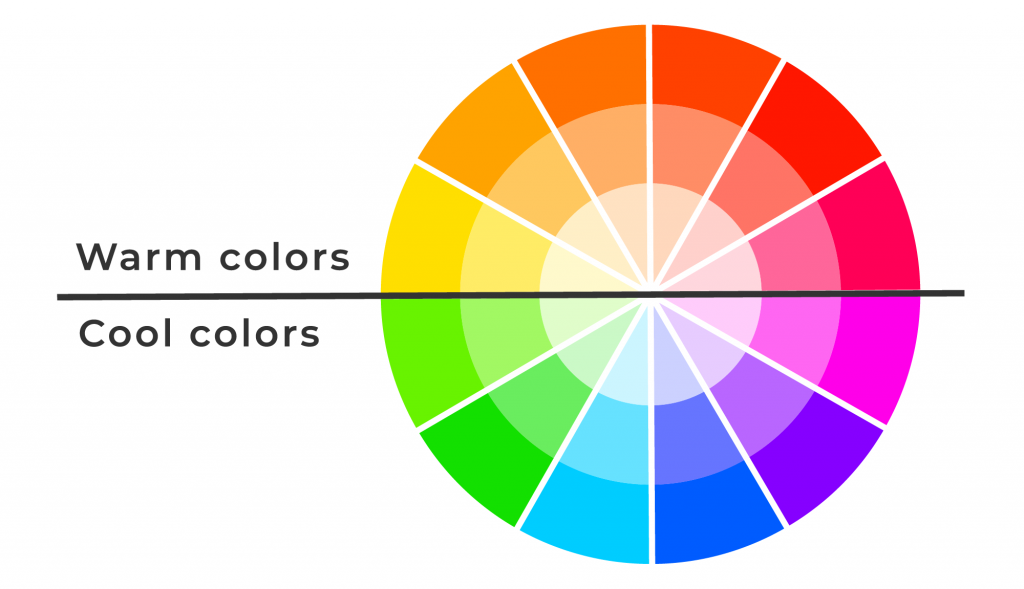
• Warm tones (reds, oranges, and yellows) convey a cozy, inviting feel.
• Cool tones (blues, purples, and greens) evoke calmness or seriousness.
• High contrast can create a dramatic look, while low contrast might feel soft or dreamy.
Once you’ve decided on the mood, choose a color palette that complements your content. This will guide your color grading decisions as you go.

3.2 Use LUTs (Look-Up Tables)
A LUT (Look-Up Table) is a preset file that applies a particular color grade to your footage. LUTs are a great way to achieve a consistent look and feel across your entire video with minimal effort.
• How to apply a LUT:
• In Premiere Pro, go to the Lumetri Color panel, and under the Creative tab, you can browse and apply a LUT.
• In DaVinci Resolve, use the Color Management settings to apply LUTs from the gallery.
• LUTs can be downloaded for free or purchased online, giving you access to a variety of looks—from cinematic to vintage.
LUTs are an excellent starting point, but you may need to fine-tune your footage further for the best results.
Step 4: Use Color Wheels for Fine-Tuning
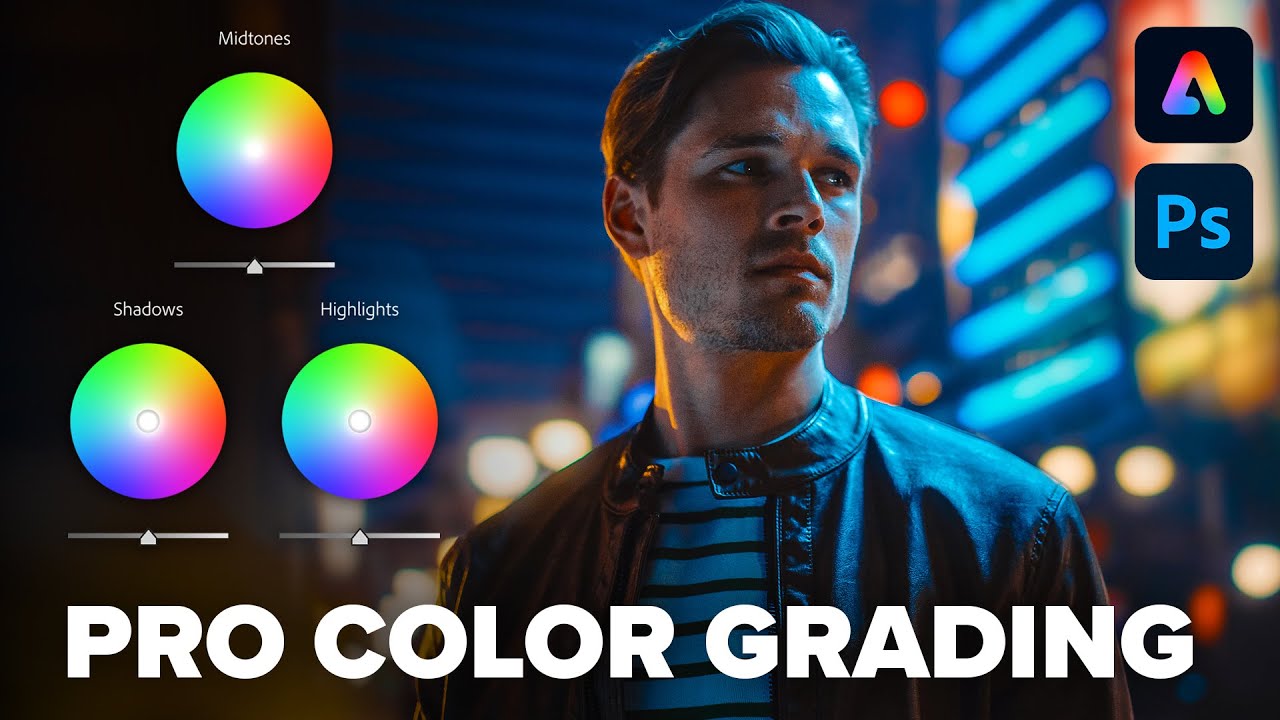
After applying basic adjustments or LUTs, you’ll want to use color wheels to further refine your color grading. Most editing software provides three wheels for shadows, midtones, and highlights, allowing you to adjust the colors for different brightness levels in your footage.
4.1 Adjust Shadows, Midtones, and Highlights
• Shadows: Adjust the colors in the darkest areas of your footage. Adding a bit of blue to shadows can create a cool, moody look, while red or orange can make them feel warmer.
• Midtones: These affect the overall color balance of your footage. Experiment with small adjustments to make your video look more vibrant or subdued.
• Highlights: Fine-tune the brightest parts of your footage. Adding warmth to the highlights can give your video a golden, sunny feel, while cooling them down can create a modern, slick look.
Take your time experimenting with each wheel to achieve the perfect balance.
Step 5: Adjust Saturation and Vibrance
Saturation and vibrance are key to making your colors pop without overdoing it.
• Saturation increases the intensity of all colors in the video, making them more vivid. Be careful not to over-saturate, as this can make your footage look unnatural.
• Vibrance is a more subtle tool that only increases the intensity of muted colors, helping maintain a natural look.
Increase saturation and vibrance in moderation to make your colors stand out while maintaining a professional, balanced aesthetic.
Step 6: Use Masks and Vignettes for Focus
If you want to draw attention to a specific part of your video, use masks or vignettes during color grading.
6.1 Create Masks for Selective Color Grading
Masks allow you to apply color grading to only specific areas of your footage. For example, you can darken the background while brightening the subject, ensuring the focus stays where you want it.
• In Premiere Pro, use the Mask tool under Lumetri Color to isolate certain areas.
• In DaVinci Resolve, use the Power Window feature to create custom masks and apply selective grading.
6.2 Add Vignettes
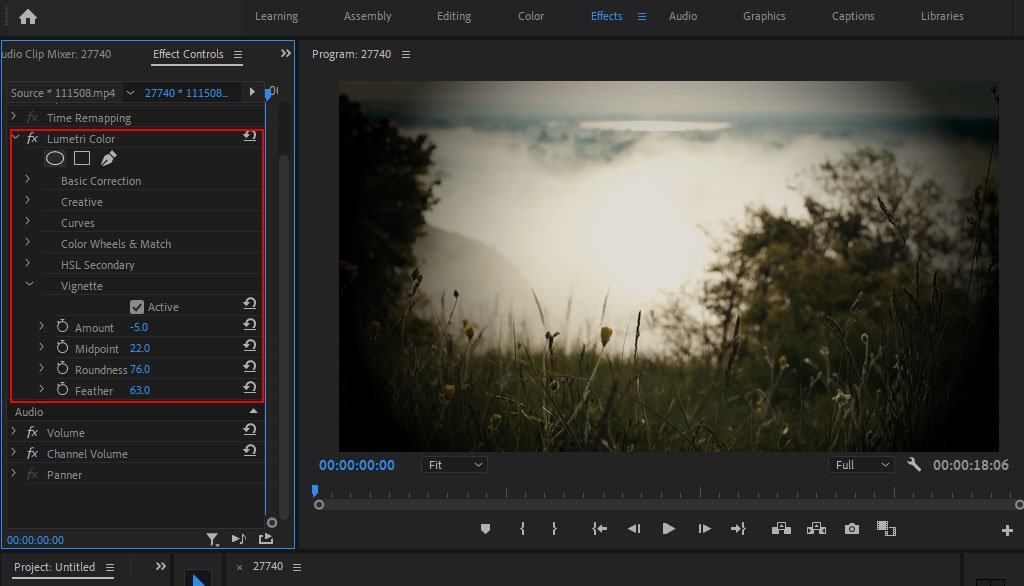
A vignette is a soft darkening of the edges of your video, which helps bring the viewer’s focus to the center of the frame. It’s a subtle yet powerful way to direct attention.
• In Premiere Pro or Final Cut Pro, you can add a vignette in the Effects panel.
• In DaVinci Resolve, use the Midtone Detail slider to apply a vignette around the subject.
This technique can make your videos look more polished and professional.

Step 7: Finalize with Scopes
Once you’re happy with your color grading, use scopes (such as the Waveform, RGB Parade, and Vectorscope) to ensure your footage is correctly balanced and the colors are not too intense.
• Waveform helps ensure your exposure and brightness levels are correct.
• RGB Parade breaks down your footage into red, green, and blue channels, allowing you to see if one color is overpowering the others.
• Vectorscope is useful for checking skin tones to ensure they look natural.
Using these tools, you can fine-tune your color grading to create a professional look without overdoing the effects.
Conclusion: Color Grading Elevates Your YouTube Content
Learning to color grade your YouTube videos like a pro can significantly impact how your content is perceived. With the right tools and techniques, you can enhance the mood, style, and overall quality of your videos, making them more engaging for your viewers.
If you’re looking to take your video editing and color grading to the next level but don’t have the time or expertise, Viral Ideas can help. Our professional editors are experts in color grading and can transform your footage into polished, visually striking content. Contact us today to learn more about how we can enhance your YouTube videos.
.png)
.png)


